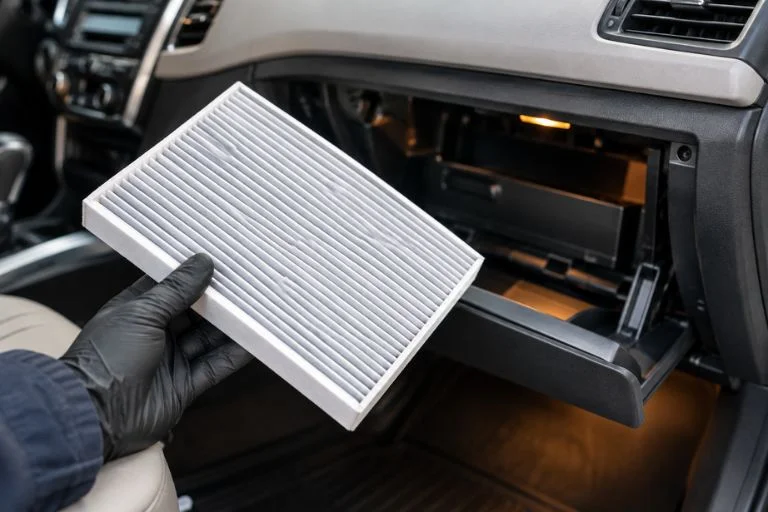
Did you ever come across a musty aroma, poor air flow or excessive dust in your vehicle, it’s likely time to know how to replace the cabin air filter parts in your car. This small component is vital to maintaining fresh air and a breathable environment in your car. Knowing how to replace cabin air filter elements can save you money, boost air quality in your vehicle, and help your HVAC system last longer — no matter if you’re a seasoned DIY mechanic or a new car owner. In this guide we will come across why cabin air filter replacement is necessary, what tools does it requires and learn a step by step method to replace aircon filter properly.
Why Learning How to Change Cabin Air Filter Matters
A cabin air filter is used to filter dust, pollen, exhaust particles and other materials from the air before they can enter your car’s interior. This filter eventually gets blocked and air quality and airflow decrease. Having the skills to properly change cabin air filter components on a regular basis ensures:
- Better, fresher air in the cabin
- More efficient heating and cooling system
- Reducing the HVAC blower motor from strain
- No more allergens and odor in the vents
- Some vehicles are more fuel-efficient
Some vehicles offer improved fuel consumption. Most manufacturers suggest that you change the cabin air filter every 12,000 to 15,000 miles, but this can differ based on driving conditions. In areas where dust or pollution is a common occurrence, you may have to change the aircon filter components more often.
A clogged cabin air filter that strains the HVAC blower motor over time can sometimes contribute to broader electrical load issues in older high-mileage vehicles. For vehicles where prolonged maintenance neglect has extended beyond the air filter to deeper mechanical systems, Tagore AutoParts stocks a full range of used engines for popular makes and models across the USA.
Signs You Need to Replace Aircon Filter Components
Before diving into how to change cabin air filter parts, it helps to recognize the warning signs. Watch for:
- Weak airflow from the vents even at high fan settings
- Musty or unpleasant odors when the AC or heater is running
- Excessive noise coming from the blower motor
- Visible dust accumulating on interior surfaces
- Increased allergy symptoms while driving
If you notice any of these symptoms, it’s a strong indication that you need to change aircon filter components as soon as possible.
Tools You’ll Need
Learning how to change cabin air filter parts doesn’t require specialized equipment. Here’s what you’ll typically need:
- Install New Cabin Air Filter (Refer to Owner’s Manual for proper part number)
- A screwdriver (Phillips or flathead depending on the type of vehicle you have)
- Flashlight and gloves
- Owner’s manual if available
Step-by-Step Guide: How to Change Cabin Air Filter
Follow these steps for a smooth cabin air filter replacement process:
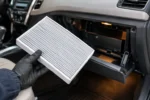
- Check the location of the cabin air filter housing. In most vehicles, it’s located behind the glove box or under the dashboard. Some models have it located underneath the hood close to the windshield.
- Unlock the glove box/access panel. If it is behind the glove box, it may be necessary to remove stops or hinges to be able to unlock the unit completely for it to be opened.
- Take out the old filter. Gently remove the old filter, remembering the airflow arrows indicated on the frame.
- Inspect the housing. Remove all leaves, dust and dirt from the area prior to inserting the new filter.
- Insert the new filter. Make sure the airflow direction matches the original orientation.
- Close the access panel or glove box. Ensure everything clicks securely back into place.
- Test the system. Turn on your AC or heater to confirm improved airflow.
This process usually takes 10 to 20 minutes, making it one of the easiest DIY maintenance tasks for those wondering how to change cabin air filter components without visiting a mechanic. For vehicles where a cabin air filter replacement job has also prompted a broader vehicle inspection revealing transmission wear, Tagore AutoParts carries reliable used transmissions for a wide range of makes and models at competitive prices nationwide.
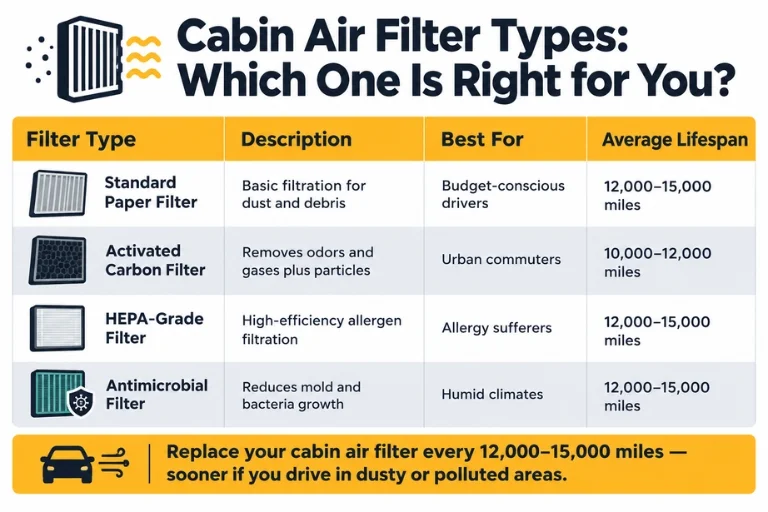
Cabin Air Filter Types Comparison
| Filter Type | Description | Best For | Average Lifespan |
| Standard Paper Filter | Basic filtration for dust and debris | Budget-conscious drivers | 12,000–15,000 miles |
| Activated Carbon Filter | Removes odors and gases in addition to particles | Urban commuters | 10,000–12,000 miles |
| HEPA-Grade Filter | High-efficiency filtration for allergens | Allergy sufferers | 12,000–15,000 miles |
| Antimicrobial Filter | Reduces mold and bacteria growth | Humid climates | 12,000–15,000 miles |
Choosing the right filter type can make a noticeable difference when you replace aircon filter components, especially if you have allergies or live in a polluted area. For Honda Pilot and SUV owners where the cabin air filter is located behind the glove box and is one of the most commonly deferred maintenance items, Tagore AutoParts stocks used Honda Pilot engines for drivers whose maintenance inspection has also revealed engine wear worth addressing alongside routine filter replacement.
DIY vs Professional Cabin Air Filter Replacement
Most drivers can use cabin air filter replacement techniques on their own, but there are cases where professional assistance is required:
- DIY is recommended when: You have an easy access to the filter housing and basic tools.
- Choose a professional when: The filter is inaccessible, not easy to access and disassemble dashboard elements, and/or the part number is not known.
Chevy Traverse and family SUV owners where cabin air filter maintenance is part of a broader scheduled service interval, Tagore AutoParts also stocks used Chevy Traverse engines for drivers whose service inspection has uncovered engine wear alongside HVAC maintenance needs.
Conclusion
Learning how to replace cabin air filter components is an easy task that can have a profound effect on the air quality and HVAC system in your vehicle. You should replace the air filter in the car cabin regularly, not only to enhance comfort but also to prevent extra damage to the car’s ventilation system. You can do this yourself, or hire a professional to do it, but it’s important to be proactive in maintaining your aircon filter parts as this guarantees a cleaner and healthier ride each time. Take the time now to prevent problems — inspect your cabin air filter and breathe more fresh air on every trip.
For all your vehicle parts needs — from HVAC components to complete used engines and transmissions — trust Tagore AutoParts, your reliable autoparts supplier serving customers nationwide.
Frequently Asked Questions
When should I replace aircon filters?
Generally, it is advised to replace your engine after every 12,000 to 15,000 miles.
Will a dirty cabin air filter have a negative impact on my AC system?
Yes, a dirty cabin air filter will block the air flowing through the AC and will cause your system to work harder and less efficiently.
How much does it cost to replace the aircon filter parts?
Typically, the aircon filter parts replacement can cost around $40 to $150 depending on the labor and parts used.
May I clean and use again a cabin air filter or must it be replaced?
Unless it’s completely necessary, it’s not recommended as cleaning does not completely restore the efficiency of the filtration — replacement is safer.
Where do I find the correct filter size of my vehicle?
Refer to your owner’s manual or look up your vehicle’s make, model and year online.