Do you hear a grinding or humming noise from your wheels while driving? Well, this sound can be the one reminding you of a worn-out or a failing wheel bearing. Wheel bearing are one of the most essential components that allow the wheels of your vehicle to rotate smoothly. Knowing how to replace a wheel bearing, especially the back wheel bearing, can give you a better idea of the repair process, save money if you do the repairs yourself, and let you know what your mechanic is doing. We’ll look at the equipment you’ll need, how to replace a wheel bearing, and some things you should expect to see when you’re dealing with a worn wheel bearing.
Signs You Need a Wheel Bearing Replacement
Want a wheel bearing replacement? These are the signs you must need to follow:
- The growling noise also increases with the speed
- Clicking or popping sounds during turning
- Looseness in the steering with vibration
- Illumination of the ABS warning light on the dashboard.
- Uneven or excessive tire wear.
Catching these symptoms early prevents wheel bearing failure from cascading into more expensive repairs involving the hub assembly, axle shaft, and surrounding drivetrain components. For vehicles where bearing neglect has already caused broader mechanical damage, Tagore AutoParts stocks a full range of used engines for popular makes and models across the USA to support complete vehicle restorations.
Know What Tools You’ll Need
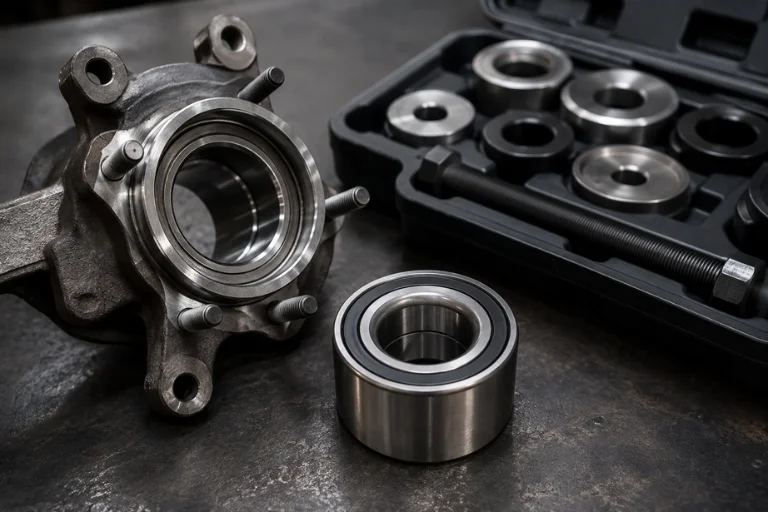
Having the right wheel bearing install tool kit on hand makes the job significantly easier and reduces the risk of damaging the new bearing during installation. Here’s what a typical DIY toolkit should include:
| Tool | Purpose |
| Wheel bearing press/install kit | Presses the bearing in/out without damaging the hub or knuckle |
| Torque wrench | Ensures axle nut and bolts are tightened to spec |
| Impact wrench | Removes stubborn lug nuts and axle nuts quickly |
| Bearing puller | Removes old bearing races from the hub |
| Jack and jack stands | Safely lifts and supports the vehicle |
| Socket set | Removes various bolts and fasteners |
| Anti-seize compound | Prevents corrosion on new bearing components |
| Torque angle gauge | Achieves precise final tightening on certain axle nuts |
Step-by-Step: How to Replace a Wheel Bearing
1. Make sure your vehicle is fully prepared
Make sure your vehicle is parked on a flat surface, engage the parking brake, and loosen the lug nuts slightly before lifting the car.
2. Make sure to remove the wheel and brake components
Make sure to take off the wheel, then remove the brake caliper and rotor to expose the hub assembly. Support it with a hook or wire so it doesn’t strain the brake line.
3. Detach the Hub Assembly
Remove the axle nut (often requiring significant torque, so an impact wrench helps), then unbolt the hub carrier or knuckle assembly depending on your vehicle’s design.
4. Press Out the Old Bearing
Using your wheel bearing install tool kit, press the old bearing out of the hub or knuckle. This is where a proper press kit really pays off, ensuring even pressure distribution and preventing damage to the housing.
5. Clean and Inspect
Thoroughly clean the hub bore and inspect it for scoring, corrosion, or damage. A damaged hub may require replacement rather than simply installing a new bearing.
6. Press in the New Bearing
Align the new bearing squarely and press it into place using the correct adapter size from your tool kit. Never press on the inner race alone when installing — always apply pressure evenly across the outer race to avoid internal damage.
7. Reassemble
Reinstall the hub assembly, torque all bolts to manufacturer specifications, reattach the rotor and caliper, and mount the wheel back on.
8. Torque and Test
Tighten the axle nut to the specified torque value, lower the vehicle, and torque the lug nuts. Take a short test drive to confirm the noise is gone and everything feels stable. For trucks and SUVs where wheel bearing replacement jobs frequently uncover transmission wear at the same time — particularly in 4WD and AWD vehicles — Tagore AutoParts carries dependable used transmissions for a wide range of makes and models to support complete drivetrain repairs affordably.
Front vs. Rear Wheel Bearing Replacement
There are some of the differences you should note between front and rear wheel bearing replacement:
- Rear bearings on many vehicles are part of a sealed hub unit, which often requires the entire assembly to be replaced rather than just the bearing.
- Rear axle nuts may have different torque specifications and locking mechanisms compared to front hubs.
- Some rear-wheel-drive and all-wheel-drive vehicles have more complex differential and axle shaft components to work around.
- Access to rear bearings can sometimes be easier since there’s no steering knuckle involved.
Always make sure to refer to the user manual, as the procedure might differ significantly based on make and models. For Ford F-150 and full-size truck owners whose front wheel bearing replacement is a common high-mileage maintenance item, Tagore AutoParts stocks used Ford F-150 engines for drivers whose bearing inspection has also revealed deeper engine wear worth addressing at the same time.
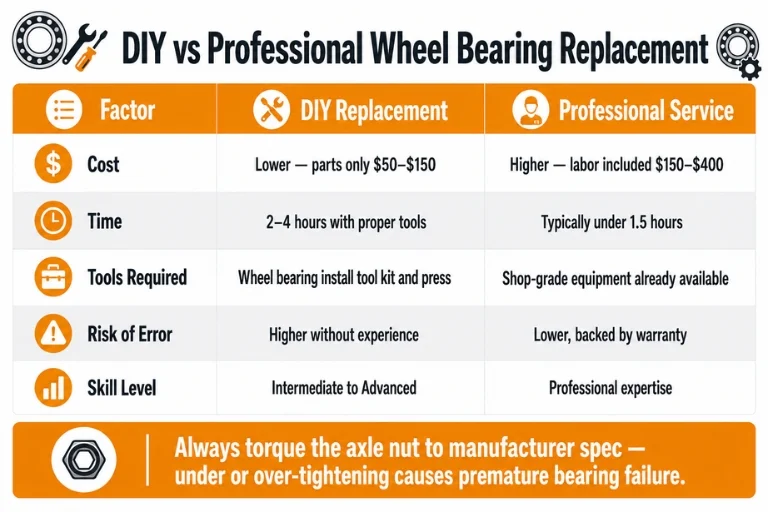
DIY vs. Professional Replacement: A Quick Comparison
| Factor | DIY Replacement | Professional Service |
| Cost | Lower (parts only, $50–$150) | Higher (labor included, $150–$400) |
| Time | 2–4 hours (with proper tools) | Typically under 1.5 hours |
| Tools required | Wheel bearing install tool kit, press | Shop-grade equipment already available |
| Risk of error | Higher without experience | Lower, backed by warranty |
| Skill level | Intermediate to advanced | Professional expertise |
For Jeep Wrangler and 4×4 owners whose wheel bearing replacement is a regular part of off-road maintenance cycles, Tagore AutoParts also stocks used Jeep Wrangler engines to support complete drivetrain restorations for drivers tackling serious terrain.
Conclusion
Your car starts humming on the highway or maybe you feel vibration through the steering wheel that wasn’t there before. It’s easy to blame the tires, but the real culprit is a wheel bearing. A worn bearing doesn’t just make noise — left alone, it can wear unevenly, throw off your ABS sensor, and eventually put real strain on other parts of the wheel assembly. Catching it early is what keeps a simple fix from turning into an expensive one.
Replacing a bearing yourself can save you a lot of money. You’ll need the right tools, a torque wrench and a lot of patience — bearings need to be seated correctly or you’ll be right back where you started in a few thousand miles. One thing worth knowing before you proceed further is you must know that the procedures might vary a lot from vehicle to vehicle. Know that with proper diagnosis, installation and testing you can help your vehicle stay safe and reliable on the road.
For all your vehicle parts needs — from wheel and suspension components to complete used engines and transmissions — trust Tagore AutoParts, your reliable autoparts supplier serving customers nationwide.
Frequently Asked Questions
Can I replace a wheel bearing myself?
With proper experience and knowledge you can replace a wheel bearing on your own.
Is replacing a wheel bearing an easy job?
No, replacing a wheel bearing is not an easy job as it requires a good experience and knowledge before your perform the task.
How much does it cost to replace a car wheel bearing?
Typically a car wheel bearing might cost up to $250 and $500, depending on whether you choose a professional repair shop or a local one.
Can I drive a car with a bad wheel bearing
No, it is not safe to drive with a bad wheel bearing, as it can cause seizing of the bearing and cause extreme friction.